In CuteBrains, messaging is a convenient feature that allows teachers, students, and other users to communicate privately. This feature complements notifications for assignments, forum discussions, and more, enhancing overall communication within the platform.
Messaging Features:
- Notification Icon: A number at the top of the screen indicates new messages received.
- Messaging Drawer: Clicking the icon opens a panel with sections for starred, group, and personal messages.
- Contacts: Access your contacts and manage contact requests easily through the Contacts link.
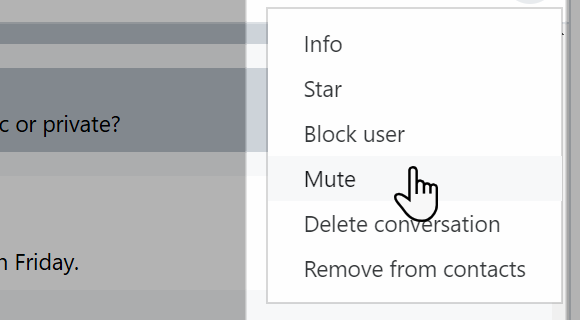
- Starred Messages: Add a star to important messages by clicking the three dots next to a message.
- Mute Notifications: Mute messages to stop receiving email notifications for new messages.
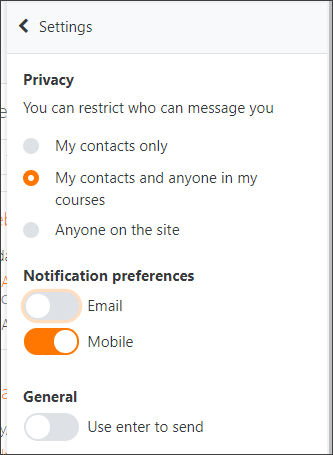
- Settings: Click the settings icon to adjust privacy, notification preferences, and choose the option to press enter to send messages.
With these features, Cutebrains ensures efficient and organized communication for all users.
Personal Messaging Space in Cutebrains
CuteBrains provides each user with a personal messaging space to organize their communications. This area allows users to store draft messages, important links, and notes for future reference.
 Deleting Messages
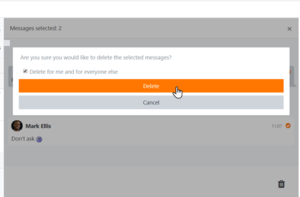
To delete messages, simply click on the message to select it (indicated by a checkmark) and then click the bin/trash can icon at the bottom of the messaging drawer. Note that deleting messages removes them only for the user performing the action and does not affect other participants in the conversation.
Enabling Teachers to Delete Messages of Others:
To grant teachers the ability to delete messages from others in a group conversation:
- Create a Custom Role: Define a new role with the capability moodle/site:deleteanymessage allowed.
- Assign the Role: Go to Site admin > Users > Permissions > Assign system roles, and assign this role to the user as a system role.
A user can hold both the teacher role in a course and the system role allowing message deletion, ensuring they can manage and clean up group communications as needed.
Restricting Messages in Cutebrains
In Cutebrains, users have control over who can send them messages. By default, you can choose to receive messages only from your contacts or also from others in your courses.
Adjusting Message Restrictions:
- Privacy Settings: Click the settings icon to customize who can message you—either limit to contacts or allow course participants.
- Site-Wide Messaging: Administrators can enable a setting that allows messaging across the entire site, making all users visible to each other.
These options ensure that users can manage their messaging preferences according to their needs.
Group Messaging in Cutebrains
Teachers and authorized users can set up group messaging within course groups in Cutebrains. This allows for streamlined communication among group members.
Setting Up Group Messaging:
- Create Group Conversations: Users with the necessary permissions can enable group messaging while setting up course groups.
- Access Group Messages: The group will appear in the messaging section, allowing members to view and participate in discussions.
Teachers should be part of the group to access and contribute to the conversation, ensuring effective communication and collaboration.
Sending a Message to Selected Course Participants
Teachers can efficiently communicate with selected course participants in Cutebrains by following these steps:
Access Participants: Navigate to the Participants page within your course.
Select Participants: Choose specific participants from the list or use the “Select All” option to include everyone.
Send Message: Click “Add/Send Message” from the “With Selected Users…” drop-down menu. Compose your message and then click “Send” to deliver it.
Administrators have the added capability to send messages across multiple courses using Bulk User Actions, enabling broader and more streamlined communication.
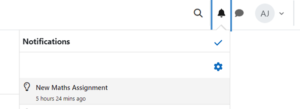 Notifications
Notifications in Cutebrains
In Cutebrains, notifications keep teachers, students, and users informed about important events such as new announcements,

assignments, and achievements.
- Web Notifications:
-
- Enabled by default, ensuring everyone stays updated.
- Alerts appear with a number in the notifications menu at the top.
- Managing Notifications:
- Click to view new notifications.
- Options include marking all as read, accessing notification preferences, and viewing all notifications.
- Detailed View:
Select “View Full Notification” for a comprehensive list.
 Receiving Notifications in Cutebrains
Cutebrains ensures that you stay updated with all the essential events through customizable notification settings. Here’s how you can manage your notifications:
- Notification Alerts:
-
- New events are highlighted in the notifications menu at the top of your screen.
- Configuring Notifications:
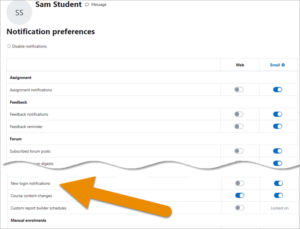
- Access the notification preferences page from the user menu or via the gear icon in the notifications menu.
- Set how you want to receive notifications: web, email, or mobile (if using Cutebrains Mobile).
- Web Offline Notifications:
- Manage settings to be notified of new events the next time you log in if you are offline.
Customize your notification preferences in Cutebrains to ensure you receive timely updates in the way that suits you best!
Admin Settings for Notifications in Cutebrains
Administrators have control over the default notification settings in Cutebrains. Here’s how to configure them:
- Access Notification Settings:
-
- Navigate to Site Administration > General > Messaging > Notification Settings.
- Default Notification Plugins:
- Web Notifications: Enabled by default.
- Email Notifications: Enabled by default, but ensure the site is properly configured for email delivery.
- Mobile Notifications: Disabled by default and require configuration before they can be used.
Administrators can manage these settings to ensure that notifications are tailored to the needs of the institution.

Default Notification Preferences in Cutebrains
Administrators can configure default notification preferences for different types of messages in Cutebrains through the following steps:
- Access Default Notification Settings:
- Go to Site Administration > Messaging > Notification Settings.
- Set Notification Preferences:
- Enabled: Users can modify these settings in their profiles. New users will inherit the default settings set by the administrator, but they can adjust their preferences on their own Messaging settings page.
- Locked: Users cannot alter these settings. New users will inherit the default settings established by the administrator, and these preferences will apply universally to all users.
By configuring these settings, administrators ensure that notifications are delivered according to institutional requirements while allowing flexibility for user adjustments where applicable.
Email Notifications in Cutebrains
In Cutebrains, all email notifications and messages are sent to the email address specified in a user’s profile. However, administrators have the option to allow users to designate an alternative email address for notifications.
- Allow Alternative Email Addresses:
- By default, users receive notifications at their primary email address. To enable the option for users to specify an alternative email, go to Site Administration > Messaging Settings and adjust the settings accordingly.
- User Preferences:
- Once enabled, users can set an alternative email address by navigating to Preferences > User Account > Notification Preferences. Click on the gear icon next to “Email” in the table header to enter the alternative email address.
————————————————————————————————————————-
Messaging Settings
Messaging Settings for All Users
In Cutebrains, users can customize their notification preferences for new messages through their messaging settings page. Here’s how:
- Access Messaging Preferences:
- Users can access their messaging preferences by clicking on the Preferences link in the user menu or by selecting the gear icon in the messaging icon at the top of their screen.
- Customizable Options:
- The available options for configuring notifications depend on what has been enabled by the administrator. For example, the mobile notification option will only be visible if the site supports the mobile app.
Enabling or Disabling Site-Wide Messaging
In Cutebrains, the personal messaging system is enabled by default. However, site administrators have the option to manage its availability:
- Disabling Messaging Site-Wide:
- Administrators can disable the personal messaging system from the Site administration > Advanced features menu.
- Adjusting Messaging Settings:
- To control site-wide messaging preferences, administrators can go to Site administration > General > Messaging > Messaging settings.
- The option to “Allow site-wide messaging” is disabled by default. If enabled, this setting allows users to view all other users on the site when selecting someone to message and gives them the option to accept messages from anyone on the site.
———————————————————————————————————————–
Messaging FAQ
How can messaging be restricted?
To restrict messaging to specific users, you can adjust the site:sendmessage capability settings. Change this capability from “allow” to “not set” for the authenticated user role to limit messaging by default. Alternatively, create a new role with the site:sendmessage capability set to “allow” and assign it to selected users. For those who misuse messaging, you can create a “Cannot send messages” role with the capability set to “prohibit” and assign it accordingly.
How can messaging be disabled completely?
Messaging can be entirely disabled site-wide by unchecking the ‘Enable messaging system’ checkbox found in Site administration > Messaging > Messaging settings.
When is a user considered offline?
By default, users are marked as offline after 5 minutes of inactivity. This setting can be adjusted by an administrator in Site administration > Plugins > Blocks > Online users.


